Most of the time team members are working on central
database in Sitecore development environment. This is great as everybody have the
same state of the database.
But what will happen if any developer installed a
Sitecore module?
Lets take the example of WFFM module. One of the team member
installed on local instance where database is central and everybody using this
database. After installation complete, a Sitecore instance run perfectly on
that one developer machine and other team members will started to get errors.
What’s the cause of their error?
WFFM items will be installed on central database but DLL
and other files are installed only on our single developer machine. When any
developer launched Sitecore in browser, it starts to look the required DLLs and
the files. As they are not available on other developer’s machine, they all started
to get the error.
How to fix this?
There are two option that I know to fix this
·
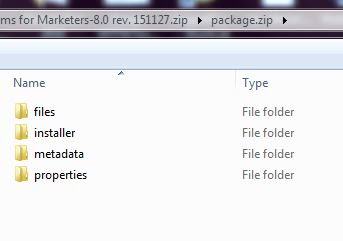
Unzip Sitecore ZIP module, copy only the files
and paste into the relevant location. This seems to be a straight forward option,
but believe me you have to do this on each developer machine and all files must
be pasted at the correct folders.
 |
| Extract files from package zip |
·
Second option need some preparation but provide a
solid option to the team.
o
Open Sitecore desktop -> Development Tools
-> Package Designer.
o
Click on down arrow of “New -> From
existing package” in Package Designer screen.
 |
| Load existing package |
o
Upload and select your package. For example
we have WFFM package here.
o
Select a Sitecore item listed in left site metadata
section one by one and click on “Remove source” button.
This
will delete all the Sitecore entry and you will get only files in last that we
need.
Now
click on “Save” or “Save as” option under “Package” Tab.
 |
| Remove items from source package |
You
can also click on “Preview” button, just to verify you are getting a list of required
files only. If you find any Sitecore item entry in the list then delete it from
package designer screen.
 |
| Package Preview Screen |
That’s it. Now share this package with
other developers and they will installed the package on their local Sitecore
environment and get the required files on correct folder path as per Sitecore
items in central database.
One last thing, you should also check the
size of new package. It must be smaller than the source package size.
I hope you like this Sitecore article. Stay tuned for
more Sitecore related articles.
Till that happy Sitecoring
:)


